Posts

Week 4 summary

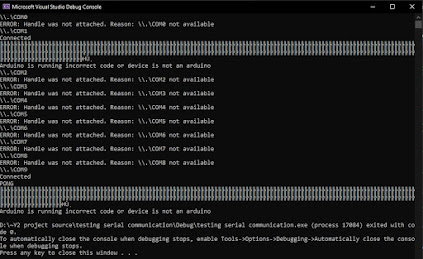
In week 4, we were mainly making small changes to our code for the bench inspection. Heres Erik's summary for week 4 During testing the communication after connecting the computer and Arduino, I discovered that at seemingly random points the Arduino would be reset and the rest of the program break as a result. I believe the cause of this issue is that the destructors for the ‘SerialPort’ objects are called once functions end. This issue could not be fixed in time for bench inspection, so instead of having the game code and arduino code interface with each other, they will both run independantly and the user will use the arduino to read the voltage and confirm its correct, then use the game code to input the resistance value and move onto the next level. Adams progress for week 4: After the change in functionality because of the communication code not working, we decided to have th game code and arduino code run independantly. I had to modify the game code to prompt the user...

Week 3 Summary

Image
In week 3, we are all starting to finalise our parts of the project. Here is Abdul Wahab's summary for week 3: In the third week and after conducting a research in how to get more accurate responses from the Arduino code, the most accurate function to use is the if + else if statement and combine this function with the  Boolean logic OR & AND statements. The final code was more accurate and it  can  to  certain  degree know which level that have been passed by knowing the mathematically measured values and compare it with the values that have been measure in the analog input. Moreover, in order to get more accurate feedback from the Arduino code, the code should have a range of values that was calculated by getting the error from these and were implemented in the code.   Adam completed all 3 Levels for the game code, heres his summary: Level 3 consists of a RC circuit, and involves finding the resistance of the resistor that will result in the capacitor...

Week 2 Summary

In the second week we started to delve deeper into the our respective tasks. Abdul Wahab came accross some issues with the Arduino code, which he has outlined below: In the second week the Arduino code needs to be modified because of problem that has been faced. Th e  problem is that when the values were tested it will always show that the user have a wrong voltage value. So, the suitable thing was to use an if statement in the Arduino code and it was working correctly to a certain degree. Further research needs to be done in order to get more accurate response from the code.   Erik continued to work on the communication between the computer and the Arduino: We managed to work around the junk data received from the Arduino. Initially, we tried to copy only the needed data to a new, smaller string, however, this did not solve the issue, so we resorted to checking against an expected result one character at a time. Additionally, the code now sweeps across the windows COM ports t...

Week 1 Summary

Image
The first week of our project was mainly experimenting and familiarising ourselves with the scope of our project and the equipment.  Erik was wokring on the communication code, so the arduino and computer will be able to interface. This is what Erik had to say: To allow communication between the main C/C++ code running on a desktop and the Arduino, we decided to use an existing library to simplify the process instead of writing the fundamental serial communication code ourselves, which could have proved challenging in the time-frame we have for this project. Many of the libraries that we considered had trouble compiling at all, and the only one we have found that compiled is poorly documented and difficult to find the origin of. However, it is the only one that is working so we will be using it for the time being. If a better one is found, we will switch to it. Finally, when trialling the library, we discovered that it would receive ‘junk’ data from the Arduino that would ...